TLDR: Add console=ttyS0,115200n8 to kernel cmdline
The PCEngines APU2 is a x86_64 CPU, meaning it can boot standart Desktop Linux distributions execpt for the ability to output graphics. Debian offers a graphical and a textbase installer. Therefor with the later we can install easily.
Debian Images can be found at debian.org. Choose a version that suits you. “small installation image” is what is generally refered to as “netinstall”.
In this guide we go with “debian-9.2.1-amd64-netinst.iso”.
Use Win32DiskImager to copy the Image to your stick.
To copy the image to an install stick we use dd to copy it:
dd if=debian-9.2.1-amd64-netinst.iso of=/dev/sdX bs=4M
Replace sdX with your device. You can use dmesgshortly after pluggin in to figure it out.
Plug your USB->RS232 adapter into both machines. Based on your preferences you can use any tool you want.
Use putty to establish a serial connection with 115200 Baud (Speed) to COMX where X refers to your adapter.
We will cover two alternative tools here:
Run as root or use sudo:
busybox microcom /dev/ttyUSB0 -s115200
Run as root or use sudo:
screen /dev/ttyUSB0 115200
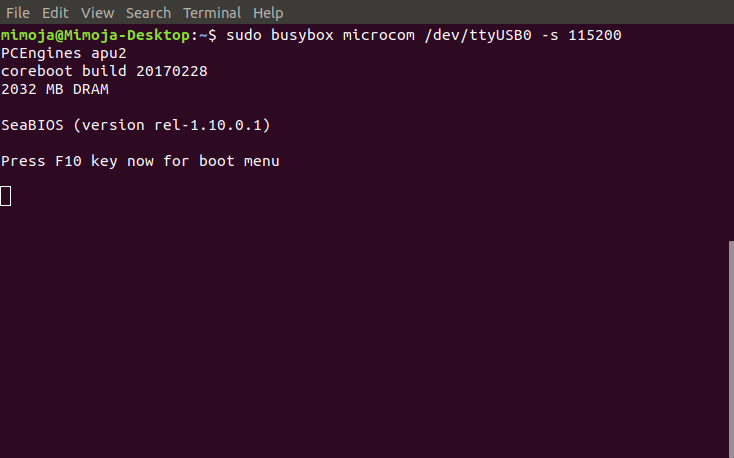
Connect the USB stick, power and monitor the serial output. You should see something like this:
Press F10, choose your USB stick and hit enter.

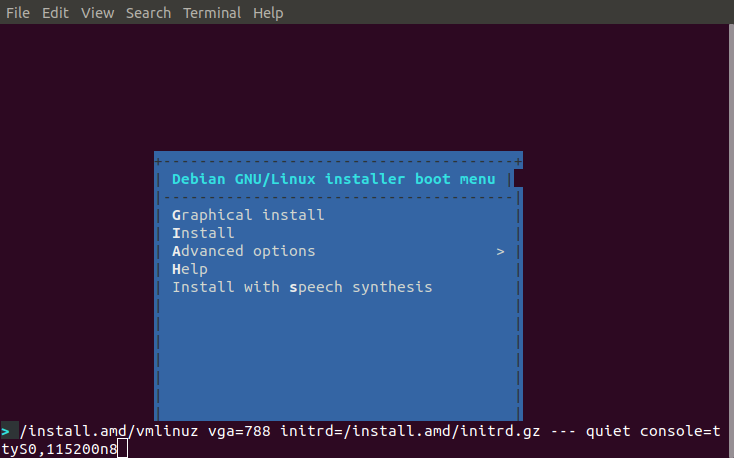
In the now opening boot menu we need to modify the kernel cmdline. Choose Install and hit TAB. Now add console=ttyS0,115200n8 after the quiet. Hit enter to boot the system.

Follow the installation process and dont forget to enable SSH-Server if you want to control your device remotly after installation.

The Debian Stretch Installer will copy the kernel boot parameter so you should end up with a system outputting to serial after installation finished.

Reboot and enjoy!